Description
Article no.: 3021-12
Preparation
The best time to make clay tiles is in the fall and spring. If the temperature is too high, the clay mixture dries too quickly, cracks and does not adhere well to the substrate. If the temperature is too low, moisture and mold problems can arise, as the clay liner makes the walls very wet. Sometimes even shoots start to grow in the wall. A funny sight but completely harmless. The clay contains natural substances from grain and straw etc. and as soon as it dries it stops "growing". All you are left with is natural reinforcement.
Clay lining should be carried out as late as possible in the construction process, as the material is sensitive to strong frame movements. The installation of exterior panelling as well as lining and mouldings indoors should therefore be completed before the cladding is carried out. Also allow for the clay cladding to build up about 2.5 centimetres and install the joinery accordingly. Gaps and cavities more than 4-5 centimetres deep should first be filled with wooden wedges, strips or similar.
First, clear the walls of old, loose clay tiles, wallpaper, etc. Take the loose clay tiles and soak them for 3-4 days in a plastic tub or vat before reusing them. Do not add more water than can be absorbed by the mortar.
Clay clinkers used to be attached to diagonal ribs or wooden dowels. They can be used again if they are in good condition. Usually the clay liner has been attached directly to the surface of the timber chipped with a special axe. Such a surface cannot normally support a new clay liner.
Cutting new 'scales' is also difficult in old, dry timber. Instead, supplement with a galvanized wall net or a sturdy chicken wire.
Fix the net with galvanized nails or stainless steel staples at 10-20 centimetre intervals, so that the net is as rigid as possible against the surface. Galvanized 3" wire nails are also excellent (see picture) as an alternative to pegs and are easier to attach. The nail is driven into the wall at intervals of 15-20 centimetres and then bent so that it overlaps at least two meshes in the mesh (see picture).
Cover the areas that are not to be riveted. Flooring felt or masonite is good for floors, and water-resistant tape is suitable for linings, moldings, etc. The clay can be washed off with water, so clay spills are not a disaster.
Attach the net
Attach the net with galvanized nails or stainless steel staples. Galvanized wire nails also work well.
Recipe
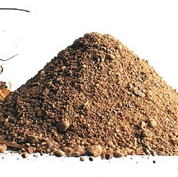
8 litres of clay flour (approx. 10 kg)
24 litres of sand (approx. 35 kg)
2 litres of glue water
4-8 litres of water
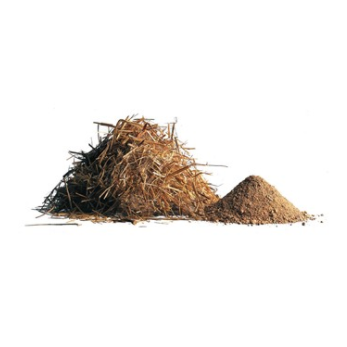
8-16 litres of chopped flax straw
possibly old soaked clay liner
This recipe gives a mixture of about 25-30 litres, which is enough for about 2 square metres of wall surface, a normal-sized batch the first time you try to repair broken old clay liner. The following quantity calculation, on the other hand, gives about 25 square meters of clay lint:
5.5 bags of clay flour of 25 kg each
500 kg of sand
40-80 liters of water
4 bags of soaked, chopped flax straw of 5 kg each
20 liters of glue water (400 g of animal glue water)
Mix all the ingredients in a cement mixer, except the flax straw, to a smooth mass. Finally, add the soaked flax straw and process for about 10 minutes. You can also stamp the clay mixture into a wooden box, covered with a strong, waterproof tarpaulin. Tough, but fun. When it's ready, the mixture should be smooth and easy to spread, without being watery.If you want to reuse old clay, you can mix it with an equal amount of new clay. However, the material you soak must not contain wallpaper residues, cakes of lime mortar and the like.
The clay is the main binder. The quantity given here applies to sand-free clay flour that can be bought in bags in Gysinge. Tile kiln clay cannot be used, as it already contains sand. As with all other mortars, you must keep to certain proportions between binder (clay, lime, cement, etc.) and aggregate (sand, gravel, etc.). Normally you have 1 part binder by volume to 3 parts aggregate. Too little binder results in weak mortar with poor adhesion. Too much binder causes shrinkage and cracks. So do a test first and let the clay line harden!
The glue water is a pure binder and is prepared from animal glue.
200 g bone glue + 10L hot water. Stir the bone glue into the hot water in a spacious vessel. Leave overnight so that the glue melts properly. Stir occasionally.
The sand should be fine-grained and salt-free masonry sand. Do not use sea sand. The flax straw must be rooted and chopped into lengths of about 5 cm. Soak the flax straw for at least a couple of hours, preferably 24 hours, before use.
The work
Moisten the surfaces to be clayed by splashing water over the surface with a lime brush or paint brush. The moisture will prevent the clay liner from drying too quickly. First, fill deeper cavities and cracks in the substrate with mortar. Smooth out the mortar with the trowel, making sure that the clay penetrates well into all the cavities. Leave to dry until the next day.
The clay line cracks easily if it is laid in layers thicker than 2 cm at a time. Therefore, leave the base layer to dry overnight. However, it should not be completely dry before the next layer. It is therefore advisable to moisten the walls by splashing water with a paintbrush over the surface before starting again. If old clay tiles remain on the walls, it is particularly important that the edges of the tiles are well moistened so that the clay tiles stick together. When patching old clay tiles, it is a good idea to lay the new mortar slightly thicker than the old. The clay liner will sink slightly when it dries.
Plastering
Apply a layer of just over 1 centimeter of mortar. Smooth it out with a trowel and, if possible, use a "Spanish", a wooden or metal disk with a handle, which you move around in circles to smooth the surface. Leave to dry until the next day.
Finishing
Apply a second layer of clay liner. The recommended thickness is about 2.5 cm. Smooth the surface with the trowel and spatula. Feel free to reduce the amount of flax straw in the finishing mortar, or omit it altogether, if you want a completely smooth surface, with no visible streaks in the mortar.
Tip! A professional bricklayer is often a good help when clay lining, even if he has not clay lined before. But he knows the technique of plastering and that is the main thing.